How to Make Coconut Whipped Cream in the Ninja Blender
Friends, today I have something so simple, so delectable, and, so perfect for this time of year since fresh fruits abound.
For those of us that are dairy free, this is a home run. For those that eat dairy, this is still a home run. I’m talking whipped cream. From coconut. Oh yeah.

To be honest, I wasn’t quite sure if this would work, as you typically need a very cold metal bowl and hand mixer to aerate whipped cream. But, never one to shy away from a challenge, I gave it a shot anyway.
It more than works, and in fact, I think it’s way easier than making standard whipped cream.
This should work with any Ninja Blender, don’t worry about that. If you have a KS model, use the food processor bowl (I used the mini bowl in the Mega KS). If you have a different model, just use the standard blender jar.
Making Coconut Whipped Cream in the Ninja Blender
Ingredients:
- 1 can full fat coconut cream
- Sweetener of choice to taste (optional)
- 1 teaspoon pure vanilla extract (optional)
A note on the ingredients:
I made my whipped cream with zero additional ingredients aside from the coconut cream, but, if you have a sweet tooth, you may feel you need to sweeten the cream with your choice of sweetener. Traditional whipped cream is made at a ratio of 1 cup heavy cream to 1/4 cup granulated sugar. Personally, I wouldn’t recommend granulated sugar, but, you could consider using a couple of tablespoons of honey, coconut sugar, pure maple syrup or even a few drops of liquid Stevia to taste.
Step-by-Step
1) Obtain a can (or two) of full fat coconut cream, and place in the refrigerator at least overnight. Additionally, put your Ninja Blender jar and blade in the refrigerator as well. You may have to explain to your family that you’re not nuts (as I did), and that there is a reason you’ve placed your blender jar in the fridge.
2) When the coconut cream and jar are sufficiently cold, remove, and prepare your supplies: Blender, coconut cream, can opener, spoon, and bowl (I forgot to put a bowl in this picture!). You can see that the blender jar is hazed over from being chilled. The most important thing is getting the metal blade chilled.
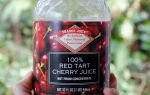
3) Turn the can upside down and open.
You want to turn it upside down because the cream and water in the can will separate, with the cream rising to the top. By the way, this is coconut cream from Trader Joe’s.

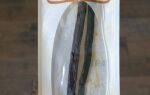
4) Pour the water out of the can.

5) Scoop the cream out of the can into your blender jar. The cream should be very stiff – not runny.

6) Blend on “2” (or hold down the lid in the Pulse or steady state blend for models that don’t have speed settings) for about 30 seconds, until the cream has become fully whipped.

7) At this point, add sweetener and vanilla if using, and blend for about 10 seconds to combine. Taste, and repeat until you get a ratio you like.

Though you may be tempted, I don’t recommend licking the blades!

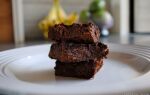
Enjoy with fresh fruit, or, straight up for a rich and tasty treat.

In case you’re wondering, it passes the thickness test with flying colors:

And with this post, I think I can officially retire from blogging, because I’m not sure I can ever top it. But, alas, I will keep trying. ![]()
![]()
Enjoy, and thanks for reading!