Chip-a-Licious: Make Your Own Kale Chips
If you’ve been in a Whole Foods, PCC, or other “natural” market lately, you’ve probably seen kale chips popping up on end caps and other places where impulse buys are likely. They are usually in a cheese flavor (or “cheez” as it were), and, they are so expensive! A single bag is usually around $5.99 or more. That is nuts! (And, incidentally, is the price of a bag of nuts.)
Making your own kale chips is easy, fast, and way cheaper than store bought. – and you get way more.
Kale chips are quite literally, as easy as 1-2-3:
1) Get some kale
2) Add seasonings to your taste
3) Use a dehydrator or oven on low heat to dry for a couple of hours

Here, I’ll walk you through it.
1) Get some kale.
I like to use this Trader Joe’s organic kale because it is already pre-chopped. One bag has a lot and it’s only $2.99. You guys have heard me whine on and on about how we don’t have a kitchen right now (because we don’t), so, I am definitely convenience-oriented. I use this kale for a bunch of stuff, including smoothies, but it also makes great kale chips.
If you are chopping your own, just rough chop it – you don’t need to remove the stems, and you can leave the pieces fairly large in size.

2) Season to your taste.
You can knock yourself out here, but I like to use simply a bit of olive oil and salt. For a single serving, I put about 2 big handfuls of kale, one tablespoon of olive oil, and a dash of salt in a big bowl that has a lid. Then, I shake it up to get everything distributed, and proceed to the next step.
You could really use any seasonings here: Grated hard cheeses like parmesan or asiago, coconut oil instead of olive oil, powdered garlic and herbs, and the list goes on and on. Just remember to use a bit of oil to let whatever you’re adding stick to the kale, and you’re golden.
3) Use a dehydrator or oven on low heat to dry for a couple of hours.
I use my dehydrator for this step – just place in a single layer on a tray, and dry for about 2 hours. Below is what it looks like before and after.
If you are using the oven, pre-heat to 275 degrees F, place on a cookie sheet in a single layer, and bake for about 20 minutes, flipping halfway through.
Before drying:

After drying:

And, in the end, you have a healthy snack that even kids will eat (I have validated this with several friends with kids). Since this can be a dehydrator project, it’s a fantastic one to even get the kids involved in making. Let them choose their flavorings and load up the dehydrator – it is fun to watch the leaves transform.
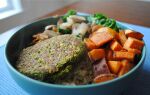
In other news, I’m excited to report that we brought our couch and table home from storage late on Sunday after a hectic weekend of completing punch list items. We are still unpacking some boxes and getting organized, but I will share some finished great room before and after photos soon! Here is a sneak preview. For the first time in nine months, I had a legitimate space to do this blog post!

Thanks for reading, and have a great week!