Test Kitchen Tuesday

Healthy Eating and Healthy Living for a Happy Life!
  • Home
  • My Favorite Things
  • Ninja Blender Recipes
  • Recipe Directory
  • Recipe Reviews
  • Product Reviews
  • Tips, Tricks, and Misc.

Creamy Non-Dairy Mashed Potatoes, and an Easy Way to Store Leftovers

Angela | November 26, 2013

It’s Thanksgiving Week, and, you’re probably either rushing around figuring out menus, or, sitting back and relaxing because someone else is doing that and you just have to show up with a smile and eat.

Today, I have a two-parter for you, no matter which of the two above scenarios apply.

Part 1: How to store mashed potato leftovers so that you can easily have mashed potatoes any day of the week with no prep time. So, when no one wants to take home the potatoes, you can happily snap them up.

Part 2: A creamy mashed potato recipe that needs no dairy and tastes every bit as good as potatoes loaded with butter and cream.

Part 1: Maximize Your Mashed Potatoes

I have a fondness for ice cube trays. But, not those cheesy new-fangled trays that crack to pieces after one or two uses. I’m all about the sturdy ice cube trays from my youth, that were built to last, like these. mashed_potatoes

But of course, I don’t use them for making ice. Ice cube trays are handy for a lot of things, mostly to do with creating convenient smoothies. But, one day, when thinking about storing some left over mashed potatoes, an idea hit me: What if I portioned mashed potatoes into ice cube trays, froze them, and then stored in a freezer bag?

I’ll tell you what happens! You can have mashed potatoes in any portion size any night of the week in about 5 minutes. As Paula Deen would say, BOOM, y’all!

Just take out as many cubes of potatoes as you want, add to a pot, heat over low heat and, voila, your mashed potatoes are back to life with a little bit of stirring. If they turn runny in this process, you’ll want to thicken them back up with a thickening agent, which runs the gamut from arrowroot powder to a roux to cornstarch (just be careful, almost all cornstarch is GMO).

You’ll wan to let your family know that the ice cubes are not indeed ice, or you may get a quizzical question or two, or even just a statement, as I did.

“I presume this is not ice, like the time my orange juice wasn’t juice,” was what my finicky hubby had to say when he spied these cubes in the freezer.

For the record, I told him, no, it wasn’t ice, and, that juice mix-up was an innocent mistake years ago when I put freshly-made vegetable broth in an old orange juice container. Ha!

Part 2: Creamy Non-Dairy Mashed Potatoes

I did a little poll on my Facebook page a while back to see what type of diets you guys favor, and, not surprisingly, vegetarian, Paleo, dairy-free, and gluten-free were all top lifestyle choices. So, for Thanksgiving this year, I thought I’d share with you my non-dairy mashed potatoes that you’d never know are non-dairy, which meet all of the above selections (though I know they are on the fence for Paleo).

The secret to this recipe? My favorite: Avocado.

I know what you’re thinking, “but won’t it turn my potatoes green?!”

The answer is, well, yes, very slightly. But, we’re not talking The Incredible Hulk kind of green. Just a very faint hint of green. And, the result is very much worth it. These potatoes can compete with any mashed potatoes made with dairy any day!Dairy Free Mashed Potatoes | Test Kitchen Tuesday

Non-Dairy Mashed Potatoes

Print this Recipe!

Makes: 4 servings

Suggested Ninja Blender Jar

  • Ninja Pulse: 48 ounce jar with standard blade
  • Ninja Professional Blender: 72 ounce jar with standard blade
  • Ninja Kitchen System: 64 ounce food processor jar with standard blade
  • Ninja Mega Kitchen System: 64 ounce food processor jar with standard blade

Ingredients:

  • 3 cups roughly chopped potatoes of your choice (I prefer Yukon Gold for this), skin on
  • 1/2 Hass avocado
  • 2 TBS to 1/4 cup preferred unflavored non-dairy milk (I use almond milk)
  • Salt to taste

Method:

  • Boil potatoes in a medium pot until soft, about 15 minutes
  • Drain, and add to the jar of your Ninja Blender
  • Add avocado and 2 Tablespoons milk
  • Pulse 3-4 times to combine, and then blend on “1” (hold lid on Pulse) until the desired consistency is reached, probably 45-60 seconds
  • If more milk is needed, add, then pulse 4-5 times to combine
  • Taste, and add salt as needed, probably 1-2 pinches

Nutritional Breakdown

image image
Comments
7 Comments »
Categories
Ninja Blender, Ninja Mega Kitchen System, Ninja Pulse, Side Dishes
Tags
dairy-free, mashed potatoes, Ninja Blender, Ninja Blender Recipes
Comments rss Comments rss
Trackback Trackback

Creamy Coffee Smoothie–No Bananas Allowed!

Angela | November 5, 2013

It was a doozie of a weekend in the Pacific Northwest! Mother Nature let us know in no uncertain terms that winter is coming, and proceeded to huff, and puff, and blow all the last leaves off the long leaf maples in our front yard (along with branches of all shapes and sizes). I have to admit, I’m sad to see summer go – especially since I spent the majority of it in a full leg cast on the couch!

Now that Halloween has come and gone, for some reason, my brain has clicked into book publishing mode and I’ll be spending quite a bit of time over the coming months updating my book and bringing it current. That means poring over existing recipes and also a fair amount of recipe development, including this one. (Don’t worry, if you own the book already, the second edition will be a free upgrade, and I’ll do a few “free to all” days as well).

This is a smoothie for the folks that are not big banana-in-the-smoothie types. It’s creamy and sweet without that distinct banana flavor. And, it is a great way to use up leftover coffee instead of pouring it down the drain. You can make coffee specifically for this, but, I would recommend a different approach: Freeze any leftover coffee you have in the morning in an ice cube tray, and you’re one step ahead of the game when you want a coffee-spiked smoothie.

coffee_smoothie_1

I get a lot of requests for portions for the single serve Ninja Blender cups, so I made this using the single serve cup. You don’t need the single serve cup, but if you have it, bonus!

TKT’s Healthy Coffee Smoothie

Print this Recipe!

Makes: 1 smoothie

Suggested Ninja Blender Jar

  • Ninja Pulse: Single serve cup
  • Ninja Professional Blender: 72 ounce jar, or single serve cup if you have it
  • Ninja Kitchen System: Single serve cup
  • Ninja Mega Kitchen System: Single serve cup

Ingredients

  • 1 cup unsweetened vanilla almond milk
  • 1/2 cup cold, strongly brewed coffee, or, 8 frozen coffee ice cubes (or, if you’re not doing coffee, try using brewed Teeccino, which is what I use these days)
  • 1 teaspoon honey, pure maple syrup, or, 10-15 drops liquid stevia to taste
  • 1/2 avocado (Smaller Hass variety)
  • 1 teaspoon pure vanilla extract
  • 1/2 scoop preferred vanilla protein powder (I like this one)
  • 2 teaspoons unsweetened cocoa powder
  • 5-6 ice cubes ONLY if you didn’t use coffee ice cubes
  • Top with cacao nibs for a little extra crunch!

Coffee Smoothie | Test Kitchen Tuesday

Method

Place all ingredients in the chosen jar for your Ninja blender, pulse a few times to combine, and then steady state blend for about 30 seconds until smooth. If not using a single serve cup, use level “2.”

Nutritional Breakdown

Made with 10 drops liquid Stevia & Plant Fusion protein powder, not including cacao nibs.

image image
Comments
2 Comments »
Categories
Breakfast, Ninja Blender, Ninja Mega Kitchen System, Ninja Pulse, Smoothies, Snacks
Tags
coffee, Ninja Blender, Ninja Blender Recipes, Smoothie
Comments rss Comments rss
Trackback Trackback

How to Make Coconut Whipped Cream in the Ninja Blender

Angela | July 30, 2013

Friends, today I have something so simple, so delectable, and, so perfect for this time of year since fresh fruits abound.

For those of us that are dairy free, this is a home run. For those that eat dairy, this is still a home run. I’m talking whipped cream. From coconut. Oh yeah.

Coconut Cream in the Ninja Blender | Test Kitchen Tuesday

To be honest, I wasn’t quite sure if this would work, as you typically need a very cold metal bowl and hand mixer to aerate whipped cream. But, never one to shy away from a challenge, I gave it a shot anyway.

It more than works, and in fact, I think it’s way easier than making standard whipped cream.

This should work with any Ninja Blender, don’t worry about that. If you have a KS model, use the food processor bowl (I used the mini bowl in the Mega KS). If you have a different model, just use the standard blender jar.

Making Coconut Whipped Cream in the Ninja Blender

Ingredients:

  • 1 can full fat coconut cream
  • Sweetener of choice to taste (optional)
  • 1 teaspoon pure vanilla extract (optional)

A note on the ingredients:

I made my whipped cream with zero additional ingredients aside from the coconut cream, but, if you have a sweet tooth, you may feel you need to sweeten the cream with your choice of sweetener. Traditional whipped cream is made at a ratio of 1 cup heavy cream to 1/4 cup granulated sugar. Personally, I wouldn’t recommend granulated sugar, but, you could consider using a couple of tablespoons of honey, coconut sugar, pure maple syrup or even a few drops of liquid Stevia to taste.

Step-by-StepMaking Coconut Whipped Cream in the Ninja Blender | Test Kitchen Tuesday

1) Obtain a can (or two) of full fat coconut cream, and place in the refrigerator at least overnight. Additionally, put your Ninja Blender jar and blade in the refrigerator as well. You may have to explain to your family that you’re not nuts (as I did), and that there is a reason you’ve placed your blender jar in the fridge.

2) When the coconut cream and jar are sufficiently cold, remove, and prepare your supplies: Blender, coconut cream, can opener, spoon, and bowl (I forgot to put a bowl in this picture!). You can see that the blender jar is hazed over from being chilled. The most important thing is getting the metal blade chilled.

3) Turn the can upside down and open.

You want to turn it upside down because the cream and water in the can will separate, with the cream rising to the top. By the way, this is coconut cream from Trader Joe’s.

Making Coconut Cream in the Ninja Blender | Test Kitchen Tuesday

4) Pour the water out of the can.

Making Coconut Cream in the Ninja Blender | Test Kitchen Tuesday

5) Scoop the cream out of the can into your blender jar. The cream should be very stiff – not runny.

Making Coconut Cream with the Ninja Blender | Test Kitchen Tuesday

6) Blend on “2” (or hold down the lid in the Pulse or steady state blend for models that don’t have speed settings) for about 30 seconds, until the cream has become fully whipped.

Making Coconut Cream in the Ninja Blender | Test Kitchen Tuesday

7) At this point, add sweetener and vanilla if using, and blend for about 10 seconds to combine. Taste, and repeat until you get a ratio you like.

Making Coconut Cream in the Ninja Blender | Test Kitchen Tuesday

Though you may be tempted, I don’t recommend licking the blades!

Coconut Cream in the Ninja Blender | Test Kitchen Tuesday

Enjoy with fresh fruit, or, straight up for a rich and tasty treat.

Making Coconut Whipped Cream in the Ninja Blender | Test Kitchen Tuesday

In case you’re wondering, it passes the thickness test with flying colors:

Making Coconut Whipped Cream with the Ninja Blender | Test Kitchen Tuesday

And with this post, I think I can officially retire from blogging, because I’m not sure I can ever top it. But, alas, I will keep trying. Winking smile

Enjoy, and thanks for reading!

Comments
20 Comments »
Categories
Desserts, Snacks
Tags
Coconut Cream, Coconut Whipped Cream, How To, Ninja Blender, Ninja Blender Recipes
Comments rss Comments rss
Trackback Trackback

How to Grind Whole Coffee Beans in a Ninja Blender

Angela | July 23, 2013

You know the old saying, “Necessity is the mother of all invention?” It is certainly true.

I have been “off coffee” for almost a year now, which is incredible since I live in the undisputable coffee capital of this country. But, I kicked the habit when I was trying to heal my thyroid and very rarely have real coffee these days. I genuinely like the taste of brewed coffee though, so I do have decaf every so often. DSC_0057

However, I raced the Seafair Triathlon over the weekend, and, it’s a pretty well known fact that if you’ve been off caffeine and then re-introduce it, say on race day, you can experience an ergogenic effect. Translation: It can make you a little bit faster with a little more endurance. And, let’s face it, I need all the help I can get!

My coffee vacation has been so long, in fact, that I completely forgot that Trader Joe’s sells whole beans, and you need to grind them before you leave the store. Whoops. I bought a can of organic French Roast – I prefer dark coffee – and realized when I got home that I had no idea where my coffee grinder is. It’s probably packed away in some random box in storage with most of our stuff.

Anyway, what was I to do with a can of whole coffee beans the day before my race? A light bulb  moment hit – I own the mother of all blenders (well, as you know, I own several varieties of said blender.) Why not just grind it in a single serve cup?

10 pulses later, voila, usable ground coffee.

Grinding Coffee in a Ninja Blender | Test Kitchen Tuesday

I’ll show you how to do this below, but before I get to the instructional, I just remembered  an amusing story. A few years ago, my mother was in town from Texas. I walked into the kitchen one morning to see her adding water to a cup of my freshly brewed coffee.

“What are you doing?” I inquired.

“Your coffee is SO strong!” she replied.

And that, friends, is exactly how I like it – strong. In the south, we’d call my preferred brew “motor oil.” In the northwest, we call it “perfect.”

Grinding Coffee in the Ninja Blender

This is really quite easy, but there are a few top-line notes, because I know I am going to get these questions:

  • Any Ninja Blender will work, but if you have a single serve cup, that is preferable as it will give you a finer grind – and you will be able to control the end result much more. Meaning, if you like a super fine grind, you can get that, or, if you want a coarse grind, you can get that as well.
  • If you are using a single serve cup, don’t add more than about 3/4 to 1 cup of beans at a time, as too many beans will give you different size granules due to the volume in the cup.
  • If you’re using a standard pitcher, you should add at least 1 cup, as you need the volume to blend, and instead of pulsing, you’ll steady state blend on “1” for about 20-30 seconds or until you get a consistency you like/your coffee pot requires.

With that said, here you go:

1) Obtain your preferred coffee and prepare your blender. I used the Ninja Pulse for this because it was handy. As I noted above, any Ninja will work, just take the precautions I called out depending on your selection of single serve cup or pitcher.

Grinding Coffee Beans in a Ninja Blender | Test Kitchen Tuesday

2) Fill the container based on the type you’re using. I filled my single serve cup with about 3/4 a cup of beans.

Grinding Coffee in a Ninja Blender | Test Kitchen Tuesday

3) For a single serve cup, pulse 8-12 times, or until you get the coarseness or fineness of grind you prefer.

Grinding Coffee Beans in a Ninja Blender | Test Kitchen Tuesday

4) Go brew your coffee already!

Grinding Coffee in a Ninja Blender | Test Kitchen Tuesday

For comparison’s sake, here is a before and after when I used the 40 ounce pitcher. See, still works – just perhaps not as fine in the end. This was after about 20 seconds of continuous blending – you could keep blending to make it smoother, but it won’t get as smooth as if you had used a single serve up.

Grinding Coffee in a Ninja Blender Jar | Test Kitchen Tuesday Grinding Coffee in a Ninja Blender Jar | Test Kitchen Tuesday

The bottom line is you can turn whole coffee beans into ground coffee with any Ninja  Blender, and it is a fast process.

Cheers!

Comments
30 Comments »
Categories
Ninja Blender, Ninja Mega Kitchen System, Ninja Pulse
Tags
Coffee Beans, Grinding Coffee, How To, Ninja Blender
Comments rss Comments rss
Trackback Trackback

Peach Soft Serve in the Ninja Blender

Angela | July 9, 2013

Lately, I’ve been getting a lot of questions about the Ninja Pulse, so, I thought I’d do a new recipe in the Pulse, as I sometimes do, to show that it’s highly capable, even in the shadow of its big brother, the Ninja Mega Kitchen System. The Mega gets all the limelight and fame, but for many people, the Pulse is plenty, and, as I always point out, it is more powerful than most standard blenders and stores in very small spaces. So, why not give it the spotlight it deserves?

On tap for this little demonstration: Peach Soft Serve.

It’s peach season, and you can pick up a big box of juicy peaches at Trader Joe’s (if you have one) for about $4.99 right now. A steal! So, in the spirit of summer, I picked up a box, peeled and froze a couple, and turned them into soft serve, inspired by this recipe posted in my comments section by Paul.

Now, the thing about peaches is that when they’re in season, they’re delicious. Out of season, eh, not so much. I have found that even frozen peaches are not so great out of season. So, here’s a suggestion, if you’re the plan-ahead type: Buy up a bunch of peaches right now while they’re cheap and sweet, and put in the work to freeze them in season so you can have them year round. You’ll be glad you did. 

Here’s another suggestion: Make this soft serve. You’ll be glad you did.

Ninja Blender Peach Soft Serve | Test Kitchen Tuesday

Ninja Blender Peach Soft Serve

Note before we begin: Need to know how to easily and effectively peel a peach? Go here and find out about blanching. You don’t need to totally remove the skin for this recipe, but mostly peeled would be good. A little peach skin here and there is a little more "homestyle” so I didn’t worry too much about making them perfect in mine. I just got most of the peach peeled and called it good – do what you like.

Print this Recipe!

Recommended Ninja Jar:

  • Ninja Pulse: 40 ounce jar with standard blade
  • Ninja Kitchen System: 72 ounce jar with standard blade
  • Ninja Mega Kitchen System: 72 ounce jar with standard blade
  • Ninja Professional Blender: 72 ounce jar with standard blade

Makes: 3 servings

Ingredients: ninja_peach_4

  • 2 large peaches, peeled, chopped, and frozen (about 2.5 cups)
  • 8 ounces full fat coconut milk (I use this one – it is so good and in small boxes – no worry of BPA from a can), or, whole milk, or heavy cream
  • 1 teaspoon pure vanilla extract
  • 1/4 teaspoon cinnamon
  • Sweetener of choice to taste (make first, then sweeten); Recommend no more than 3 teaspoons of pure maple syrup, honey, or 10-12 drops liquid Stevia

Method:

  • Add all ingredients to the jar of your Ninja Blender

Ninja Blender Peach Soft Serve | Test Kitchen Tuesday

  • Pulse 5-7 times to combine; You may have to push some peaches down and pulse a bit more if they are not incorporated at this point
  • Steady state blend on “2” (hold down lid in the Ninja Pulse) until a soft serve consistency is reached

Ninja Blender Peach Soft Serve | Test Kitchen Tuesday

  • Taste, and determine if sweetener is needed. If your peaches are in season and ripe, you may not need sweetener at all
  • If needed, add desired sweetener and pulse 3-4 times to combine
  • Serve immediately, or, freeze for 2-3 hours for a harder ice-cream consistency (I don’t recommend storing this longer than 1-2 days in the freezer, as it will crystalize)

Ninja Peach Soft Serve | Test Kitchen Tuesday

Nutritional Information:

For no added sweetener made with the coconut milk option.

image image
Comments
4 Comments »
Categories
Desserts, Ninja Blender, Ninja Mega Kitchen System, Ninja Pulse, Snacks
Tags
Food;, Ice Cream, Ninja Blender, Peach, Recipes, Soft Serve
Comments rss Comments rss
Trackback Trackback

A Juicing Refresher

Angela | June 18, 2013

I have had a lot of questions lately about juicing with the Ninja Blender, so I thought it was probably time to run a “juicing refresher course” with a few key pointers if you want to juice with your Ninja Blender.

The bottom line is that no matter what the Ninja Blender folks say, and no matter the model you own, it is a blender, not a masticating juicer. You can’t just put fruit and veggies into it and get pulp-free juice!

While I think the Ninja Blender is a great addition to my kitchen, the infomercial is deceptive about its ability to make juice if you don’t know the tricks. I know this is a point of frustration for many folks, so hopefully the tips below will help.

No matter if you want pulp-free juice or whole food juice, one of the main benefits of the Ninja is that you don’t have to cut up the produce into tiny little chunks – you can throw it in the blender in big hunks, or even whole if you wish.

Pulp-free juice: Making V8 Juice in the Ninja Blender | Test Kitchen Tuesday

You can make pulp free juice with the Ninja Blender. If you’re doing a juice blend, I recommend using a mixture that includes a few water-dense fruits or veggies in your blend (like cucumbers, cantaloupe, pears, etc.) as it will let you add less water.

If you are doing a single fruit or veggie juice with a hard food (like carrots), you’ll definitely need to add water.

As time has gone by, I have figured out that about a cup of added water is ideal for most juices.

To get pulp-free juice, straining is involved. Some people don’t mind straining; some people can’t stand it. Personally, I don’t mind because the clean up is infinitely easier than cleaning up a masticating juicer, which strains the pulp for you.

Here are a few strained juices I have made:

  • Apple Juice
  • DIY V8 Juice
  • Fruity Carrot Juice
  • Carrot Juice and Orange Juice (same post)
  • Dr. Oz Green Juice

Don’t throw away the pulp! You can turn it into lots of things, including tasty crackers.

Smooth, whole food juicingDr. Oz Green Juice | Test Kitchen Tuesday

You can also make more of a thicker, but not truly “pulpy” juice or juice blend.

To do this, you don’t need to add water, but you certainly can add to help thin it down. What is key is that you do need to add 4-5 ice cubes and blend a little longer than you would for pulp-free juice. I usually blend for about 90 seconds.

The longer you blend, the smoother your juice will be. Just keep in mind, this juice will be thicker than strained juice as you have left the pulp in the mixture.  I recommend your juice blends have some water-based fruits and veggies in it to help with the blending process, but if they don’t, just add water until you get the consistency right.

I haven’t done as many of these juices because I’m more of a smoothie girl, but here are a few to get your ideas flowing:

  • Beet Apple Ginger
  • Dr. Oz Green Juice
  • Green Tea Green Drink (From a Reader)

And, there you have it, two ways to make juice in your Ninja Blender.

To summarize:

  • For pulp-free juice, add about a cup of water to your fruits and/or veggies, blend for about a minute, and strain in a mesh sieve, nut milk bag, or other fine-mesh strainer
  • For whole food juice, don’t add water to your fruits and/or veggies, but do add 4-5 ice cubes and blend for at least 90 seconds until you get a smooth texture

I hope that little breakdown helps, and, if you have a favorite juice you make in your Ninja Blender, help other readers out and leave it in the comments!

Comments
11 Comments »
Categories
Juicing
Tags
Ninja Blender, Ninja Mega, Ninja Pulse, Recipes
Comments rss Comments rss
Trackback Trackback

A Memo on Magnesium–And a Raspberry Mango Magnesium Smoothie

Angela | June 11, 2013

Mmmm….magnesium! A tasty treat, right?

No?

Okay, so, you probably don’t get all excited about ways to work magnesium into your diet, but, it is a critical mineral that many people are lacking. Magnesium is important to our bodies in so many ways, including helping maintain normal muscle and nerve function, keeping your heart rhythm steady, supporting a healthy immune system, and keeping bones strong, among other things – which you can learn about here.

While we’re talking about it, you could take a peek at this article to see if you could be magnesium deficient. One big culprit that contributes to magnesium deficiency is really, really common: If you drink a lot of soda, you are flushing magnesium from your body faster than even an otherwise perfectly balanced diet can renew it.

You can get magnesium from a lot of foods – nuts, seeds, legumes, oatmeal, and leafy greens – but it can still be a challenge to meet the RDA with food alone (between about 300-400 mg a day depending on age and gender).

I have been using Natural Calm magnesium powder for a few years now, usually as a hot tea in the evening before bed, and recommend it to anyone who will listen, especially if they don’t sleep well. As it turns out, this powder has pretty much eliminated my crazy evening restless legs, which used to have a mind of their own, and helps me sleep. Don’t worry, it doesn’t put you to sleep, it just seems to help improve the quality of your sleep.

I like the way it tastes as a tea, but had a nutty idea last week: What about using it as a base for a smoothie? This idea is especially good for folks that don’t like hot beverages, or, who  don’t like the taste straight up.

It doesn’t take much, and you can adjust the amount required to your personal tastes. They give guidance on the label as to how you can figure out the right amount for you, but I use about this much – roughly a heaping tablespoon. That is probably an aggressive amount if you’ve never used it before, so start small – 1 teaspoon – and work your way up as described on the label.

natural_calm_2

And with that intro, here’s a smoothie I have whipped up a few times now, using the Natural Calm dissolved in water as the base. You can’t taste it at all, and the raspberry mango combination is really refreshing!

I rarely use ice cubes in my smoothies, but I do it in this one because of the hot liquid that’s required to dissolve the magnesium powder. And, I usually call for protein powder, some sort of fat, and maybe a nutritional booster like maca powder in my smoothies, and you could certainly add those things if you want, especially if you’ll be making this into a meal instead of a snack. But, in this case, I really think just the mango and raspberry flavors are all you need for an easy, low-cal snack.  If you have a bit of a sweet tooth that fruit alone can’t quench, add a few drops of liquid stevia to your taste.

Raspberry Mango Magnesium Smoothie | Test Kitchen Tuesday

Raspberry Mango Magnesium Smoothie

Print this Recipe!

Raspberry Mango Magnesium Smoothie | Test Kitchen Tuesday

Ingredients:

  • 1 teaspoon Natural Calm Magnesium powder (or desired amount, up to 1 heaping tablespoon), dissolved in 1/4 cup hot water
  • 1/2 cup cold water (or coconut water, or milk of your choice)
  • 1/2 cup frozen raspberries
  • 1 cup frozen mango
  • 4-5 ice cubes

Method:

  • Dissolve the Natural Calm in 1/4 cup hot water
  • Add all ingredients to your blender, pulse a few times to combine, and blend until smooth
  • If using a single serve cup, shake gently to make sure there is enough liquid on the bottom to begin blending – you may need to add slightly more water if you have a hard time getting the blended started – play this by ear

Nutritional Info

image image
Comments
1 Comment »
Categories
Ninja Blender, Ninja Mega Kitchen System, Ninja Pulse
Tags
Magnesium, Mango, Ninja Blender, Raspberry, Recipes
Comments rss Comments rss
Trackback Trackback

Four Ingredient Creamy Butternut Squash Soup

Angela | June 4, 2013

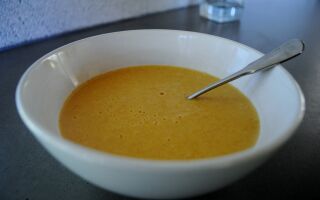
I love butternut squash soup, but, without a kitchen, I haven’t been able to make my favorite version in ages, and store bought just never lives up (and has a lot of junk in it), so I have pretty much gone without.

That is, until I created my new favorite version out of necessity. You see, I wanted soup, and had just a few things in the fridge, and only currently possess a toaster oven and a hotplate.

Luckily, the ingredients I had on hand went together well, and and my very rudimentary appliances worked out just fine. Necessity is the mother of all invention, you know! This soup is easy, fast, and soup-er tasty! (I know, I have used that joke before, but come on, it’s just too easy!)

Creamy 4 Ingredient Butternut Soup | Test Kitchen Tuesday

Creamy 4 Ingredient Butternut Squash Soup

Print this Recipe!

Serves: 2

Best Ninja Jar Choice:

  • Ninja Pulse: 40 ounce jar with standard blade
  • Ninja Professional Blender: 72 ounce jar with standard blade
  • Ninja Kitchen System: 72 ounce jar with standard blade
  • Ninja Mega Kitchen System: 72 ounce jar with standard blade

Ingredients:

  • 12 ounces uncooked, cubed butternut squash
  • 1 can light coconut milk (or full fat – I used Trader Joe’s Light)
  • 2 tablespoons cashew butter (or almond butter)
  • Salt to taste

Method:

  • Roast the squash at 400F for 30 minutes
  • Then, add all ingredients to a small sauce pan and bring to a boil, then reduce heat and simmer for 5 minutes
  • Pour into your blender and blend until smooth
  • Serve immediately, or store in an airtight container after it’s cooled

Nutritional Information:

image image

Creamy 4 Ingredient Butternut Soup | Test Kitchen Tuesday

Comments
No Comments »
Categories
Soups
Tags
Butternut squash, Coconut Milk, Food;, Ninja Blender, Ninja Blender Recipes, Recipes, Soup
Comments rss Comments rss
Trackback Trackback

In Defense of Broccoli and the Test Kitchen Tuesday Broc Choc Shake

Angela | May 28, 2013

When it comes to broccoli, I am a fan. Often overlooked – and somewhat ridiculed by a certain ex-President – broccoli is a humble super food in my mind.

Aside from the fact that it is fun to sing “Choppin’ Broccoli,” broccoli is a really powerful asset in your kitchen.

  • It’s what you’d call a “calorie neutral” food – your body spends as much or more energy digesting it than it contains in calories. You’ve never heard of someone gaining weight eating too much broccoli, now have you?
  • Calorie for calorie, it has more protein than beef (though I know, I know, it’s not a “complete” protein by itself)
  • It’s packed with fiber, which keeps you full and your internal systems happy
  • And, it has a plethora of vitamins and minerals – including calcium and iron

Here is a nutrition snapshot for a 1 cup serving. You can check out its full breakdown here.

image

While I have been known to snack on it raw to combat evening snack attack cravings, I know this isn’t terribly appetizing. (I’m hard core about my veggies, what can I say?)

However, I have an easy way for you to sneak some broccoli into your (and even your kids’) diet with a very low barrier to entry in a way you won’t even notice: Blend it in a smoothie and eat it for breakfast.

Why not? Maybe even sing a little Chopping Broccoli while you’re at it!

Choc Broc Shake | Test Kitchen Tuesday

If you make it for breakfast, as I have been doing for the last week (R&D, you know…gotta test out the end product!), this smoothie will keep you full until lunch because of its healthy fat content and substantial fiber.

Test Kitchen Tuesday Broc Choc Shake

Print this Recipe!

Ingredients: Broc Choc Shake | Test Kitchen Tuesday

  • 1 cup light coconut milk (or milk of your choice, though you want a thicker milk – preferably not almond or skim)
  • 1/4-1/2 avocado
  • 1 tablespoon unsweetened cocoa powder
  • 1 teaspoon pure vanilla extract
  • 1/2 scoop unflavored, vanilla, or chocolate protein powder of your choice (I used this one from Plant Fusion)
  • 2 pitted medjool dates
  • 1 cup chopped broccoli stalks (fresh or frozen, but you only want the stalks), optionally peeled
  • Pinch of salt
  • 6-8 ice cubes

Best Ninja Jar Choice:

  • Ninja Pulse: 40 ounce jar with standard blade
  • Ninja Professional Blender: 72 ounce jar with standard blade
  • Ninja Kitchen System: 72 ounce jar with standard blade
  • Ninja Mega Kitchen System: 72 ounce jar with standard blade

Method:

  • Add all ingredients to the jar of your high-powdered blender, and pulse 3-5 times until coarsely combined
  • Steady state blend on high (hold down Ninja Pulse lid) until the mixture comes together in a consistency you like and all ice is completely blended

Nutritional Breakdown:

Using Trader Joe’s Light Coconut Milk and 1/4 an avocado.

image image

Note: The sugars are from the dates, so, you could experiment with reducing the dates until you get it sweet enough for your tastes, or substitute with liquid stevia or another less sugary sweetener. I like the dates, though, and they add a certain something that is superior to other sweetener options I have tried out.

Comments
6 Comments »
Categories
Breakfast, Ninja Blender, Ninja Mega Kitchen System, Ninja Pulse
Tags
Broccoli, Chocolate, Food;, Ninja Blender, Ninja Mega Kitchen System, Recipes, Shake, Smoothie
Comments rss Comments rss
Trackback Trackback


Next Entries »

Want to Help Support the Site?

Simply buy your kitchen items (or anything) via this button at Amazon. There is no cost to you and I get a small fraction for referring you. Thanks for stopping by!

Featured In…

Plated | The Dish - The 10 Ultimate Cooking Hacks (#7)

The New York Times - What We're Reading

eHow - How to Make Brown Rice Flour

Greatest - 50 Creative Ways to Eat More Quinoa (#6, Cranberry Quinoa Muffins)

Ninja Blender Questions?

Start here!

Search

Most Popular Posts

Ninja Mega Kitchen System Review

Ninja Blender Review

Ninja Pulse Review

How to Make Juice with the Ninja Blender. Part 1

How to Make Juice with the Ninja Blender. Part 2

How to Make Juice with the Ninja Blender. Part 3 - A Summary

How to Make Peanut Butter in 3 Minutes

Banana Cream Pie Blender Ice Cream

Got {Almond} Milk?

Blueberry Pie Energy Bars

Making Apple Juice with a Ninja Blender


rss Comments rss valid xhtml 1.1 design by jide powered by Wordpress get firefox