Product Review: Breville Juice Fountain Crush Masticating Slow Juicer
I’ll admit it up front: I have crossed over into the dark side. After years of making juice in my Ninja Blenders, I bought a juicer and have been making juice sans pulp.
And, I have to say, it has been fan-tab-ulous.
Though I had been thinking of getting a juicer for some time, I picked up the Breville Juice Fountain Crush on somewhat of a whim. As you guys know, I am a fan of Amazon, and do pretty much all of our shopping there. My Amazon Prime membership gets well-used, and, if you are not a Prime member, I cannot recommend it enough! Free two-day shipping on most items, a huge library of video entertainment to stream for free, and, free cloud storage make it a well-worth-it luxury.
Anyway, Amazon is brilliant at marketing. Its algorithms know what I like, and, it suggests things to me daily. I usually ignore these suggestions, but, when I had an email that this masticating slow juicer was on sale for one day only at a ridiculously good price, I couldn’t resist. One-click later, the juicer was on its way to me.
As a side note, I had been researching juicers on and off for probably a year, and had already decided that I would prefer to get a masticating slow juicer (of which the Breville Crush is one) to squeeze the most nutrition out of the produce, as well as yield the least waste. When it comes to juicers, the price point can be all over the map, from $50 for an entry level machine to upwards of $500 for a more sophisticated juicer. There are many types to choose from, and here is a good article explaining the different types and their benefits.
As a second side note, the Breville Crush juicer strikes me as very similar to this Omega juicer. I have no idea if that is intentional, or if there is some OEM relationship going on, but, I find the resemblance striking.
After using the juicer daily for the past two weeks or so, I’m ready to share my thoughts with you. So, as a follow up to my “get healthier” suggestion for the New Year, here’s a rundown on a great way to introduce vitamins and minerals to your diet: Juicing.
No matter where you stand on juicing, you can find someone prominent to support your thoughts. Some people are very much proponents of juicing (especially green juices), while others believe that juicing strips the fiber, and thus most of the nutrition, out of the produce and provides a concentration of sugar straight to the bloodstream.
For this review, we’re going to put aside philosophical beliefs on juicing, and just talk about the actual machine at hand.
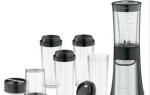
What’s in the Box
One of the reasons I’d put off buying a juicer is that I had heard that they can take up a lot of space and be difficult to clean. I’d been spending a pretty penny on Evolution Fresh juices ($6/16 ounces) for a while now, thinking I just didn’t have room for a juicer, nor did I want to clean up a juicer. Honestly, I was surprised by the relatively petite footprint of this machine, and cleaning it is easier than I thought, which I’ll detail a little later on in this review.
Here’s what’s in the box, with explanations on the right.
 |  |
This looks like a lot of stuff, but, when assembled, it’s not all that much. Here’s a step-by-step assembly process.
1. Place Juicing Bowl on the base, being careful to align the orange dot with the “Align” lettering, and then twist the bowl gently to the right to lock it in place.

2. Place the Filter Basket into the Juicing Bowl by aligning the orange dot on the filter basket with the orange dot on the juicing bowl. You do not need to twist – the basket should just sit nicely in its place.

3. Insert the Juicing Screw. Ensure that it is in place by pressing down on it to feel it click into place. There is no real “aligning” required on this step.


4. Place the Lid (feed chute) onto the Filter Bowl, aligning the orange dots, and then twisting to right to lock in place.


5. If you plan to use the Hopper, place it now, and insert the Food Pusher. (Or, just insert the Food Pusher). Then place the Juice Container and Pulp Container under their respective spouts. You have to tilt the juice container to fit it under the juice spout.
 |  |
Side note: When storing, there is a nice cutaway area on the back of the base to store the extra cord.

Let’s Make Some Juice
I figured what better way to show you how this machine works than to actually show you?! Here is a short video of the juice making process, from start to finish.

When it comes to making juice with this machine, here are a few tips:
1) Prepare your produce before beginning to juice. Pick out your ingredients and have them chopped if needed, and easily accessible on your right hand side (because the juice container is on the left). Normal food rules apply: If you wouldn’t eat it, don’t juice it.
2) Turn it on before beginning to insert produce, but don’t wait more than about 20 seconds to do so.
3) Don’t push too hard on the produce. Let the machine intake it on its own power. It should feel like its just being sucked into the machine. Use the pusher to send leafy greens down, but you don’t really need to push longer items like celery. If it gets jammed, use the reverse button to free the stuck produce. The only thing I have found that likes to jam is whole carrots – they are so hard that they tend to get stuck unless you chop them into chunks or cut them on the bias.
4) Insert greens and softer items first, followed by harder items like apples and carrots, as the harder produce will help push the softer produce’s pulp out of the machine.
5) When you’re done, or want to switch flavors if you’re making a bunch of juice, run about 16 ounces of water through the feed chute to rinse out the pulp that is in the filter basket. Be sure you have a container under the juice spout to catch the water.
Yield
The recipe I showed in the video is:
- 2-3 cups chopped dark greens (I used a kale/beet green blend)
- 2 full celery stalks
- 1 portion of fennel frond and stem
- 1 cup parsley
- 1/4 lemon (peeled)
- 1 small apple

You’ll see that I didn’t really go crazy chopping anything, not even the apple. I simply cut it off its core. I had pre-chopped a bunch of greens into chunks, which is something I do each week after my CSA delivery comes from Spud (the container is not the actual container – I am re-using one, and I only used a few cups’ worth out of it, not the whole thing).

This recipe yields about 10-12 ounces of juice (depending on if you count froth) and less than 1/2 cup of very dry pulp, including the pulp that remained in the machine. I don’t know about you, but I find that pretty impressive!


Cleaning Up
Like anything, cleaning up the juicer is much easier if you do it right away. If you leave it for a few hours, it’s infinitely harder to clean. But, if you clean up within an hour or so, it’s very easy.
There are a few tricks to making this as easy as possible, so I thought I’d outline them here.
1. Immediately after using the juicer, the manufacturer suggests running a glass of water through it, while it is on, to help start the cleaning process. In my experience, this really does help clean out the filter basket. Remember to put some sort of catch basin or the juice container under the juice spout, as that is where the water will come out.
2. There is a rubber gasket on the bottom of the juice bowl that controls the flow of pulp into the pulp chute. This gasket and pulp chute in general are the more difficult areas to clean, but if you use the little brush that comes with the juicer, it’s really a snap.


This is what it looks like immediately after use:

Use the end of the included brush to easily scoop out the pulp that remains in the pulp chute:

Then, unplug the orange gasket and remove any remaining pulp and wash normally, remembering to re-insert the gasket before your next use. The little grey washer type gasket also pops out if needed.

3. Use the provided brush to scrub out the filter basket, as pulp can get stuck in the screen. A quick scrub and you’re back in business.
4. Clean all the parts with warm soapy water (do not put in the dishwasher), rinse well, and let air dry.
The entire washing process takes no more than 2-3 minutes or so if you get the pulp out of the pulp shoot prior to starting to clean up.
Overall Thoughts
I am very happy with this juicer!
It produces a lovely juice with a bit of the pulp intact, which I like. I also like the foam that results – though some people may not. I think of it kind of like the head on a nice beer or foam on a latte.
It is night and day different to make juice in a juicer than a blender, but, the end products also serve different purposes. If you’re a “I want all the pulp and fiber type,” then juicing with something like a Ninja Blender is the way to go. If you only make juice that you strain after blending, then, a juicer is probably the way to go.
One very big difference between this juicer and a blender is that the juicer is very quiet to operate. It’s amazingly quiet, in fact. I didn’t alter the audio in the above video, so you can hear exactly how it sounds when juicing.
Here is my initial pros and cons list, which you’ll find slanted to the “pros” side, as I really can’t find much negative to say about this machine.
Pros
| Cons
|
This Breville Crush slow juicer has proven to be very easy to use and clean up – I’m sold. I won’t be buying any store-bought juice any longer – so long $6/bottle juices!
I hope you found this review helpful. If you have questions that I didn’t answer, please leave them in the comments and I’ll do my best to answer them for you. And as always, if you decide to buy a Breville Juice Fountain Crush (or any other juicer or product) from Amazon, doing so via this link helps support the site at no cost to you. Thanks for reading!